Monthly Archives: March 2025

Feeding Discus – What to feed Discus Fish and how to feed them.

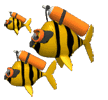
We feed our Discus primarily Beef Heart Flake, but supplement it every day with other Flake and Freeze Dried Foods.  The Multi Pack is great way to get started.  As for the Freeze Dried Foods, I would start with the Brine Shrimp.  Once your Discus get larger, you should switch to Earth Worms.  Larger Discus also like Glass Shrimp.  Beef heart Flake is extremely high in protein (higher protein than most other flake foods).  It is also fortified with Vitamins and Minerals and you will find your Discus like it more than any other flake food.  Your juvenile Discus will grow significantly faster when they are fed Beef Heart Flake.

Please feed your Discus three times a day, morning, noon and night.  The night time feeding should be with the lights out.  Discus are naturally nocturnal grazers.  If there is some bullying or aggression in your tank, please feed them at both ends of the tank.  Feed them as much as they can eat in 10 minutes.  They should be kept with some Corydoras Catfish, Plecos or Loaches to eat any food uneaten by the Discus.

Please go to this link:   http://www.somethingsphishy.com/discus-and-angelfish-food-c-41_67.html 

If you are acclimating new fish into a tank, please do not feed your new Discus for 24 hours.  As we detail in the Acclimation Instructions, you should not feed your new for fish at all for the first 24 hours after delivery.  Any food given will likely not be eaten and can end up clouding the tank.  After the stress of shipping, they will typically have no appetite.  Feed them very little for the first week as they will still have little appetite.  Over the next few weeks as they get used to their new home, they will slowly get their appetite back.  You can increase the temperature to 88 degrees to speed up their metabolism and increase their appetite.

Please do not feed your fish live or frozen Blood Worms.  Hexamitia is sadly a relatively common disease in Discus.  They can carry the deadly disease Hexamitia and freezing does not kill the Hexamitia Cysts.  Hexamitia is an internal parasite that can positively diagnosed by your fish showing long white stringy feces and they over time will become emaciated.  It is hard to treat and is contagious.  The cysts can lie dormant in the gravel and one of the only way to kill the cysts is to empty all fish and plants out of the tank, add bleach and let it for 24 hours and then do a complete water change every day for three days. 

Freeze Dried Blood Worms are fine.

Breeding Angelfish Part 12 –Growing out the Fry

This will conclude our series on breeding Angelfish.

Angelfish will eat baby Brine shrimp immediately upon becoming free swimming.

Things you should remember. First, these babies will be very small and weak, so you will need to turn off all filtration, except for a sponge filter. The biggest mistake that you can make is to do a water change in this aquarium with water that is not EXACTLY the same temperature. Angelfish fry are extremely sensitive to temperature shock and will die if you do a water change with water that is more than a few degrees different in temperature. With that said, Angelfish fry are also very sensitive to ammonia burn, so you will need to do daily partial water changes. We like to keep our grow out Angelfish tanks, until they reach about 1 inches, at a temperature of 82 degrees, as the high temperature increases their metabolism and speeds up growth.

Start adding a small amount of live baby brine shrimp to the tank within 24 hours of the fry becoming free swimming. For the first week, just feed them twice a day. To much food will quickly cloud the tank at this stage and that is one of the biggest worries. By the end of one month, they will be about 1/3 inch and will be eating baby brine shrimp four times a day At this point they are much more hardy and you are pretty much out of the woods. Your Angelfish fry should reach 1 inch in approximately 3-4 weeks. At about 1/2 inches, you can start adding in a crumbled flake food. We recommend adding Flake Beef Heart to their food and slowly convert them over to a diet of primarily flake food. This is good for them health wise and will save you a lot of money in the long run. It is also much more convenient.

Angelfish are very sensitive to overcrowding, so putting them into larger tanks as they grow is essential. If they are overcrowded, they will stop growing. Once they are not overcrowded, they will start growing again.

Breeding Angelfish Part 11 –Raising the Fry Naturally

Previously we went over how to artificially raise the fry. Now we will go over raising the fry naturally. Next we will go over growing out the baby Angelfish.

Naturally raising the fry requires very little work on your part. The parents do all of the work for you. Unfortunately, it is very common for the parents to eat the babies, so most breeders artificially raise the fry. There are advantages to naturally raising the fry over and above that it is much easier. Angelfish fry will eat some slime off the parent’s side for the first few days. Unlike Discus, they can survive without the slime and will immediately start eating other food. This slime is very high in protein and contains antibodies that help the babies fight off disease. Naturally raised fry will grow much faster at first and will have more resistance to disease throughout their lives.

There is also the enjoyment of watching your Angelfish raise the fry. They will stay mostly around the parents for the first month and the parents will zealously guard them. When a baby strays to far, the parents will mouth it back to the main school. This is done by both the males and females. There is nothing more rewarding than watching your large Angelfish parents and the fry swimming around the tank as a loose school. I find this fascinating and it has always been my favorite part or the hobby.

Things you should remember. These babies will be very small and weak, so you will need to turn off all filtration, except for a sponge filter. You can also take the sponge from a sponge filter and put it around the intake tube of an over the side filter. Canister filters are two powerful to put the sponge on their intake tube. The biggest mistake that you can make is to do a water change in this aquarium with water that is not EXACTLY the same temperature. Angelfish fry are extremely sensitive to temperature shock and will die if you do a water change with water that is more than a few degrees different in temperature. With that said, Angelfish fry are also very sensitive to ammonia burn, so you will need to do daily partial water changes.

Start adding a small amount of live baby brine shrimp to the tank within 24 hours of them becoming free swimming. Drip it directly over where the fry are located. Be careful how much you add as if most is uneaten, it can foul the water and lead to ammonia burn. After two weeks, slowly reduce the amount of baby brine shrimp you add and slowly start adding crumbled beef heart flake. After a month, they should be eating exclusively beef heart flake. By the end of one month, they will be about ½ inch. At this point they are much hardier and you are pretty much out of the woods. They will reach the size of a dime in about three months.

Breeding Angelfish Part 10 – Artificially Raising Angelfish Fry

Artificially raising Angelfish is actually very easy and if you are looking to have the highest survival ratio it is definitely the way to go.

We raise the fry in 5 gallon tanks. Getting the water correct is very important. You should take water out of the spawning tank right before transferring the eggs and put it in the 5 gallon tank. The temperature of the tank they are coming from and the one it is going into has to be the same. A difference of even a couple of degrees will kill the eggs. Clean water is absolutely essential for hatching the fry as if the water is at all dirty, fungus will form on the eggs. That is one reason that keeping the spawning tank water extremely clean is so important. To assist in keeping fungus from forming, we do two additional things. We add Methylene Blue to the water. Add enough to turn the water a deep blue. We also run heavy aeration next to the eggs, creating a current, which helps to stop fungus from forming. When the tank is ready and all the above conditions are met, quickly take the eggs out of the spawning tank and place them into the rearing tank. They should not be out of the water more than 10 seconds. Just a heads up, the spawning Angelfish will be very unhappy about you taking their eggs out. They will attack your hand and while it really does not hurt, it can be quite startling. To reduce that, I usually tap on the opposite end of the tank to distract them then quickly reach in with my other hand to take the eggs out. Hopefully the eggs will be on a breeding cone or something else that is very easy to remove. If the tank they are coming from is a ways away from the tank they are going into, I use a 2 gallon bucket full of water from the spawning tank to move the eggs into before I move them to the rearing tank.

Once the fry become Free Swimming at around 6 days, you will need to feed them within 24 hours. You should set up a Brine Shrimp hatchery on the fifth day so you can feed them newly hatched brine shrimp within hours of them becoming free swimming. They will not eat much at first and you do not want to foul the water adding two much. As the size of the spawn will vary significantly, how much you feed them will be somethings you have to decide when they hatch out. Feed your new Angelfish baby Brine Shrimp for three weeks. After three weeks start cutting back on the baby brine shrimp and when you feed them add in some finely ground flake food. Between 3 weeks and 5 weeks, slowly decrease the Brine Shrimp and increase the flake food until after the fifth week, they are eating only flake food.

After 5 weeks, you will need to transfer them to a larger tank. When Angelfish are crowded in a tank, their growth gets stunted. They will grow VERY slowly to not at all if left in a small 5 gallon tank. The size of the tank they need to be moved into depends on the size of the spawn. Spawn size can be from just a few to a couple of thousand. I once had a spawn of 2400 from one silver pair. Black and Silver Angelfish usually have the largest spawns. Young pairs typically have relatively small spawns, but the size of the spawn will increase as they mature.

In our next issue, we will go over naturally raising the fry.

Breeding Angelfish Part 9 – How to raise the fry?

Previously we went over Angelfish fry prior to them becoming free swimming. Now we will go over your options as to how to raise the fry.

You now need to make a critical decision. Do you let the Angelfish raise their own fry naturally or do you artificially raise them. Both ways have their advantages and disadvantages. We will briefly discuss the advantages and disadvantages of both methods.

The main advantage to letting the Angelfish raise their own fry is that it is MUCH less work. Other than keeping the water ultra clean via water changes, as you will not be able to run any filters except a sponge filter, there is not much to be done different to what you normally do. If possible, please take any other fish out of the tank. The huge disadvantage is that the parents will eat the fry a majority of the time. They will do it very quickly, you will not know they are eating them and there is really nothing you can do to prevent it.

There is one other advantage to naturally raising the fry that most people tend to forget. Angelfish fry will feed a little off the natural slime of their parents and in eating the slime they receive antibodies from their parents, thereby making them much more resistant to disease later in their life.

Conversely, the advantages and disadvantages to artificially raising the fry is just the opposite. There will be two to three weeks of caring for your fry several times a day.  Generally speaking, more fry will survive when you artificially raise them.

Angelfish are much easier to artificially raise that some other fish such as Discus, we recommend that you go with the artificial raising of them. In our next segment, we will go over artificially raising Angelfish.

Breeding Angelfish Part 8 – Free Swimming Fry

Previously we went over Angelfish infertility. We will now go over the fry prior to them becoming free swimming. Next we will go over fry after they become free swimming.

This is the easiest part of spawning and is also one of the most fascinating.

After 48 hours the eggs will begin to hatch. Only the dark ones will hatch. They are dark because after about 36 hours, the eye starts to develop and will show through the egg sack. Most of the fry will stay attached to the surface where the eggs were laid via a small membrane on their head. A few will become detached and will fall to the bottom. At this point the fry will look like a small comma to the naked eye. Under magnification, they are quite ugly and will look like something straight out of a monster movie.

They will remain attached to the substrate for another four days. There is not much to do at this point. They will have an egg sack and will live off of it during this entire time. There are only two real concerns. The first is the parents eating them. If you are going to artificially raise the fry, you will want to take the parents out. If you are not going to artificially raise the fry, you should cover them with a screen. The second concern is fungus. Adding Methylene Blue to the water will mostly solve this. If you are going to artificially raise them, and have taken the parents out of the tank, you should add aeration about one inch from the fry to keep the water moving around them. They will start to become free swimming 4 days after hatching.